

Organization Settings
Organization settings let admins configure infrastructure-level options. Navigate to Organization > Settings in the sidebar.
Custom SMTP (Email)
Configure custom SMTP servers for outgoing email notifications.
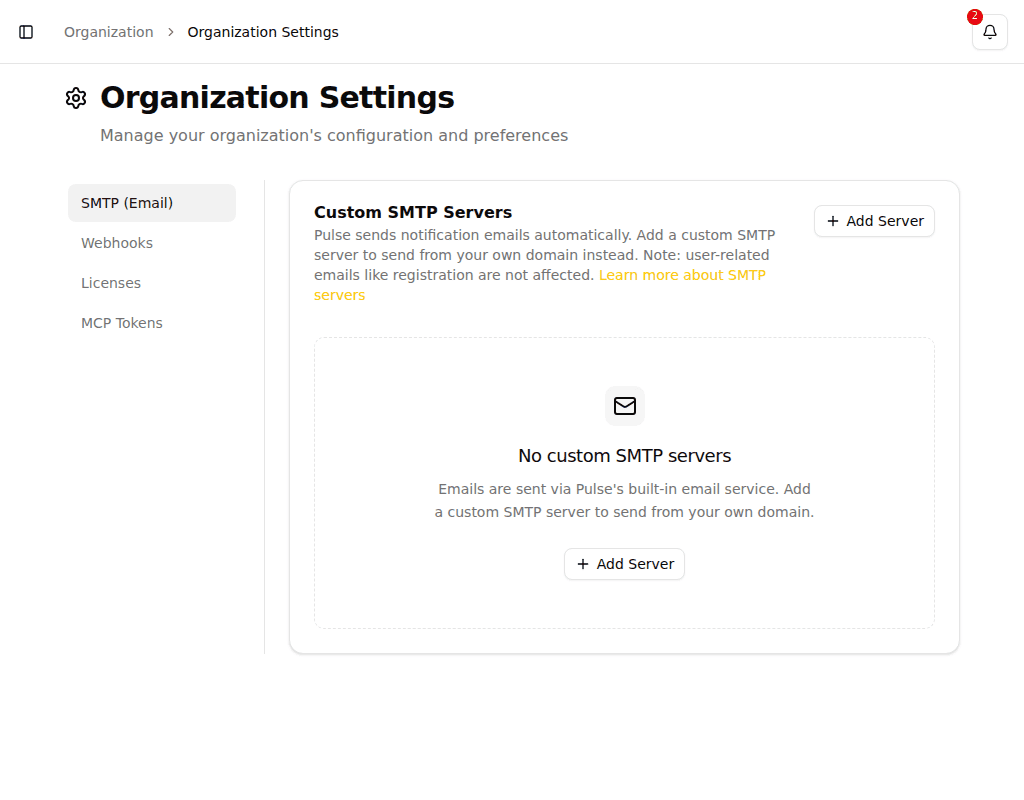
Pulse sends notification emails automatically using its built-in email service. Add a custom SMTP server to send emails from your own domain instead. When multiple custom servers are configured, Pulse tries them in the order shown, using the first one that succeeds.
Click Add Server to configure a new SMTP server:
| Field | Description |
|---|---|
| Host | SMTP server hostname |
| Port | SMTP server port (e.g., 587 for TLS) |
| Username | Authentication username |
| Password | Authentication password |
| From Address | Email address used as the sender |
| From Name | Display name used as the sender |
| Use TLS | Enable TLS encryption for the connection |
TIP
To validate SMTP settings you are able to send test e-mails
INFO
SMTP servers are used for notification emails only. User-related emails like registration are not affected.
Licenses
Licenses have their own page. See Licenses to add a license key, review your plan limits and usage, and learn about the license status banner.
License usage
The license usage panel shows how your organization's current consumption compares to the limits in your active license, measured over the license term.
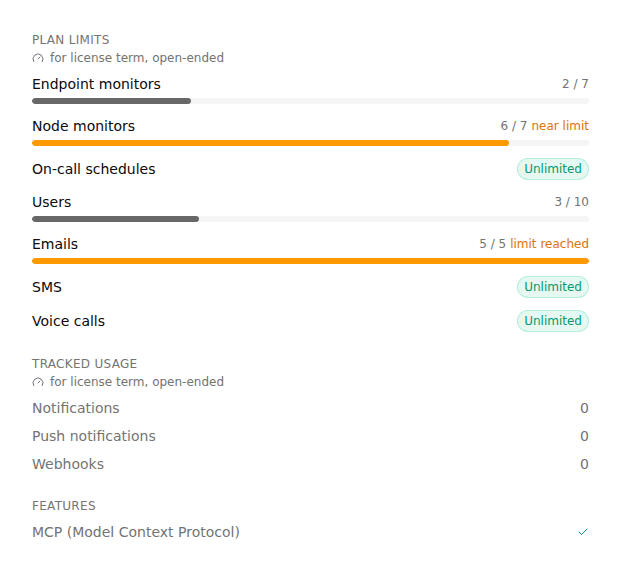
The panel has two groups:
Plan limits — dimensions with a quota cap, shown as progress bars:
| Dimension | Description |
|---|---|
| Endpoint monitors | Configured data sources against the plan limit |
| Node monitors | Kept data points against the plan limit |
| On-call schedules | Active on-call schedules against the plan limit |
| Emails | Emails sent during the license term |
| SMS | SMS messages sent during the license term |
| Voice calls | Voice calls made during the license term |
Bar colors indicate capacity status:
- Gray — within limits (below 80 %)
- Amber / near limit — approaching the cap (80 – 99 %)
- Amber / limit reached — usage exactly at the cap (100 %)
- Red / +N over — quota exceeded
Dimensions not included in your plan show a "not in your plan" badge. If usage is recorded despite not being in the plan, the badge turns red.
Tracked usage — dimensions with no quota cap, shown as bare counts for the license term:
| Dimension | Description |
|---|---|
| Notifications | In-app notifications sent |
| Push notifications | Mobile push notifications sent |
| Webhooks | Webhook deliveries made |
Features — licensed capabilities shown as enabled (✓) or not included (—):
| Feature | Description |
|---|---|
| MCP (Model Context Protocol) | Whether MCP clients can connect to this organization |
| CVE monitoring | Whether CVE monitors can be created and will scan |
| AI Canvas | Whether the AI Canvas investigation workspace is enabled |
If no active license is attached to the organization, the panel shows an informational message instead. Contact your administrator to add a license key.
Webhooks
Webhooks let Pulse send real-time HTTP(S) or TCP notifications to external systems when events occur.
Navigate to Organization > Settings > Webhooks to manage webhooks.
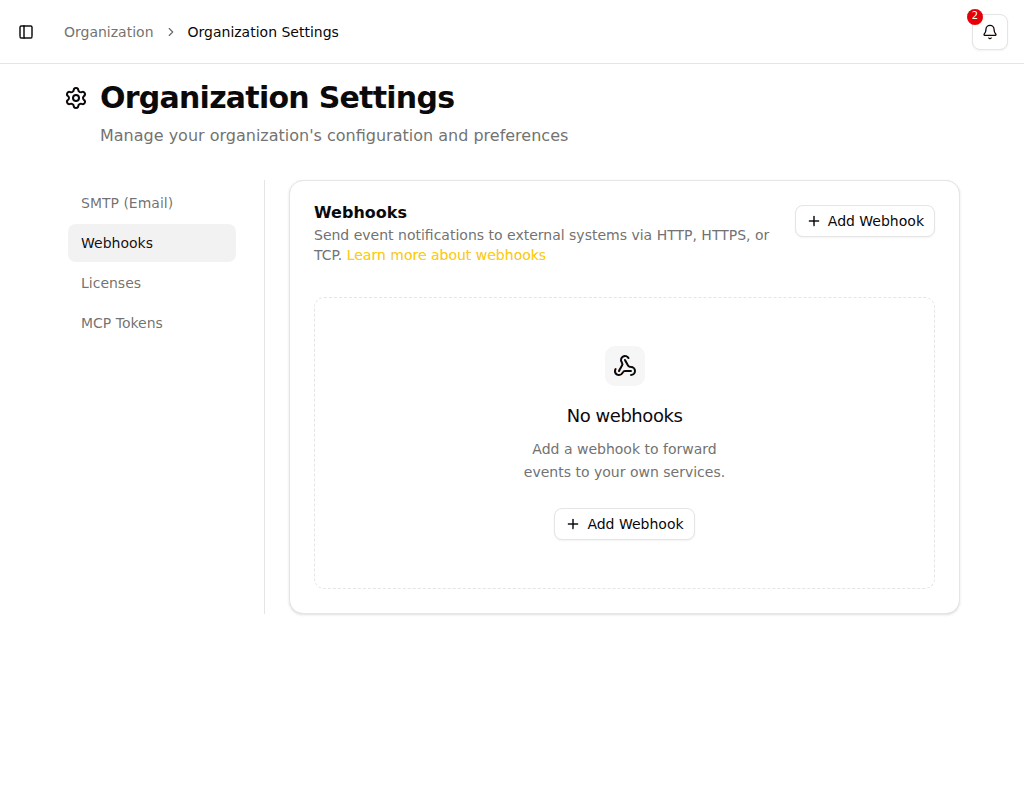
Click Add Webhook to create a new webhook:
| Field | Description |
|---|---|
| Display Name | A label to identify this webhook |
| Endpoint URL | Target URL — supports https://, http://, or tcp:// schemes |
| Active | Toggle to enable or disable delivery |
| Event Types | Select which events trigger this webhook |
WARNING
Pulse shows an "Unencrypted transport" warning when you enter a tcp:// or http:// URL. Plain TCP and plain HTTP do not encrypt payloads in transit — use them only for legacy systems that cannot use HTTPS.
INFO
TCP payloads are padded with spaces so the total message length (JSON + padding + newline) is always a multiple of 64 bytes. This supports fixed-size stream buffers on SPS controllers that read in 64-byte blocks.
How delivery works
Each event triggers a delivery to every matching webhook. Deliveries to the same endpoint are processed in order, one at a time, so a slow endpoint never causes events to arrive out of sequence.
If a delivery fails — connection error, non-2xx HTTP response, or timeout — Pulse retries up to 3 attempts total with exponential backoff between attempts. After the third failed attempt the event is dropped for that endpoint. For durability beyond this, point the webhook at a queue or reverse proxy you control.
HTTP(S) transport
HTTP(S) endpoints receive a POST with these headers:
| Header | Value |
|---|---|
Content-Type | application/json |
User-Agent | Pulse-Webhook/1.0 |
X-Pulse-Signature | sha256=<hex> — only present if signing is on |
The request body is the JSON event payload — verbatim, with no trailing newline.
TCP transport
TCP endpoints receive each frame in the order JSON payload → ASCII-space padding (0x20) → a single newline (\n) — that is, the spaces sit between the payload and the closing newline, which is always the final byte. The padding is sized so the total frame length (payload + spaces + newline) is a multiple of 64 bytes. Pulse opens a fresh TCP connection per delivery, sends the padded frame, then shuts down the write half of the socket and closes the connection.
NOTE
This is raw TCP, not WebSockets. There is no HTTP upgrade handshake, no opcode framing, and no persistent session — every event is its own short-lived connection. The 64-byte padding exists so PLCs and similar controllers can read in fixed-size blocks. The trailing newline and spaces are insignificant whitespace per the JSON specification (RFC 8259, where JSON-text = ws value ws and ws includes space 0x20 and newline 0x0A), so any conformant JSON parser accepts the padded frame as-is — no trimming required. If your parser is stricter than the spec, read until end-of-stream and trim the trailing whitespace before parsing.
Verifying signatures
When you configure one or more signing secrets on a webhook, every HTTP(S) delivery carries an X-Pulse-Signature header containing an HMAC-SHA256 of the request body.
The header value is a comma-separated list of sha256=<hex> entries — one per signing secret, in the order the secrets are stored on the webhook. Multiple entries let you rotate secrets without dropping deliveries: add the new secret, deploy the new verifier (which accepts either secret), then remove the old secret.
To verify a delivery:
- Read the raw request body as bytes — do not parse and re-serialize the JSON. Even insignificant whitespace differences will change the hash.
- Compute
HMAC-SHA256(secret, body)and format it as lowercase hexadecimal. - Compare your computed value
sha256=<hex>to any one of the entries inX-Pulse-Signature. Use a constant-time comparison to avoid timing leaks. - If at least one entry matches, the delivery is authentic. If none match, reject the request.
Node.js example:
import crypto from "node:crypto";

// `body` must be the raw request body bytes, not a parsed object.
function verifyPulseWebhook(body, header, secrets) {
  const expected = secrets.map((secret) => {
    const hex = crypto.createHmac("sha256", secret).update(body).digest("hex");
    return `sha256=${hex}`;
  });

  const received = header.split(",").map((s) => s.trim());

  return received.some((r) =>
    expected.some(
      (e) =>
        e.length === r.length &&
        crypto.timingSafeEqual(Buffer.from(e), Buffer.from(r)),
    ),
  );
}
Python example:
import hmac
import hashlib

def verify_pulse_webhook(body: bytes, header: str, secrets: list[str]) -> bool:
    expected = [
        f"sha256={hmac.new(s.encode(), body, hashlib.sha256).hexdigest()}"
        for s in secrets
    ]
    received = [s.strip() for s in header.split(",")]
    return any(hmac.compare_digest(e, r) for e in expected for r in received)
WARNING
Always use a constant-time comparison (crypto.timingSafeEqual, hmac.compare_digest, or equivalent). A normal string == comparison can leak the expected signature one byte at a time via timing differences.
Event types
Each event type is identified by its event.type key in the webhook payload:
event.type | Description |
|---|---|
incident.created | Incident created |
incident.acknowledged | Incident acknowledged |
incident.resolved | Incident resolved |
oncall.rotation | On-call responders or operating hours changed |
notification.email_scheduled | Email notification scheduled |
notification.sms_scheduled | SMS notification scheduled |
notification.push_scheduled | Push notification scheduled |
notification.call_scheduled | Voice call scheduled |
Webhook payload envelope
Every webhook delivery is a JSON object. Pulse injects the event_type field at the top level alongside the event-specific fields:
{
  "event_type": "incident.created",
  ...event-specific fields
}
Incident event payloads
The incident.created, incident.acknowledged, and incident.resolved events share the same payload shape:
| Field | Type | Description |
|---|---|---|
event_type | string | One of incident.created, incident.acknowledged, incident.resolved |
incident_id | integer | ID of the incident |
title | string | Incident title |
status | string | Incident status — "created", "acknowledged", or "resolved" |
Notification event payloads
The notification.email_scheduled, notification.sms_scheduled, notification.push_scheduled, and notification.call_scheduled events share the same payload shape:
| Field | Type | Description |
|---|---|---|
event_type | string | One of notification.email_scheduled, notification.sms_scheduled, notification.push_scheduled, notification.call_scheduled |
incident_id | integer | ID of the incident that triggered the notification |
channel | string | Notification channel — "email", "sms", "push", or "call" |
recipients | array | List of notification recipients |
Each entry in recipients has:
| Field | Type | Description |
|---|---|---|
display_name | string | Display name of the recipient |
email | string|null | Email address, if available |
phone_number | string|null | Phone number, if available |
oncall.rotation payload
The oncall.rotation event fires whenever the set of active on-call responders changes or the operating-hours or override status of a schedule changes:
| Field | Type | Description |
|---|---|---|
event_type | string | Always "oncall.rotation" |
schedule_id | integer | ID of the on-call schedule |
schedule_name | string | Name of the on-call schedule |
previous_responders | array | Responders active before this change |
current_responders | array | Responders active after this change |
in_operating_hours | boolean | Whether the schedule is currently within operating hours |
is_override | boolean | Whether an override is currently active |
Each entry in previous_responders and current_responders has:
| Field | Type | Description |
|---|---|---|
id | integer | Login ID |
name | string | Display name or email |
email | string | Email address |
phone | string|null | Mobile number, if set |
Connected MCP clients
AI assistants and automation tools connect to Pulse via the Model Context Protocol using OAuth: each user authorizes a client in the browser, per organization. There are no tokens to create or copy — the client discovers Pulse's authorization server, registers itself, and sends you to a consent screen.
INFO
MCP access requires an active license that includes MCP. The consent screen only offers organizations whose license includes MCP; if none of your organizations qualify, contact your administrator to upgrade the license.
Connecting a client
The MCP endpoint is available at /mcp on your Pulse instance. The Connected MCP clients settings tab shows the exact URL with a copy button.
Prerequisite
CS_BASEURL must be set to the externally reachable base URL of your Pulse instance (e.g. https://pulse.example.com). The OAuth discovery metadata and the authorization endpoint URL are derived from it — with the default value, clients on other machines cannot complete the flow.
Claude Code
claude mcp add --transport http pulse https://<your domain>/mcpReplace <your domain> with the host your Pulse instance is reachable at — the same value as CS_BASEURL. Add --scope user to make the server available in every project on your machine instead of just the current one.
The first tool use (or /mcp in Claude Code) opens your browser: sign in to Pulse, pick the organization to connect, and approve. Tokens are handled automatically from then on.
claude.ai, Cursor, and other MCP clients
Add a remote (HTTP) MCP server with the URL https://<your domain>/mcp. The client discovers the OAuth configuration, registers itself automatically, and opens the Pulse consent screen in your browser.
The consent screen
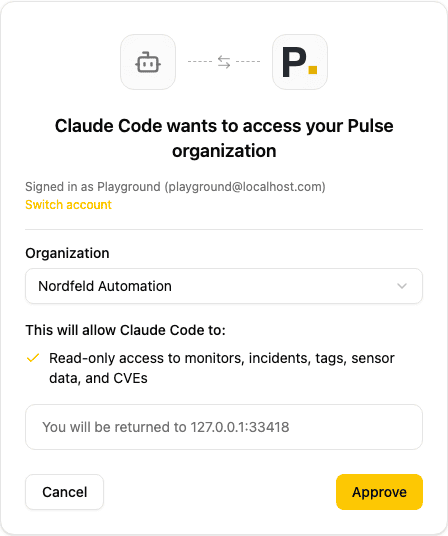
The consent screen names the client, lets you choose which organization to connect, and lists what access it gets (read-only access to monitors, incidents, tags, sensor data, and CVEs). It also shows where you will be returned after approving — verify that host matches the tool you started the connection from before clicking Approve.
Managing connected clients
Navigate to Organization > Settings > MCP Clients to see every client that was granted access to the organization.
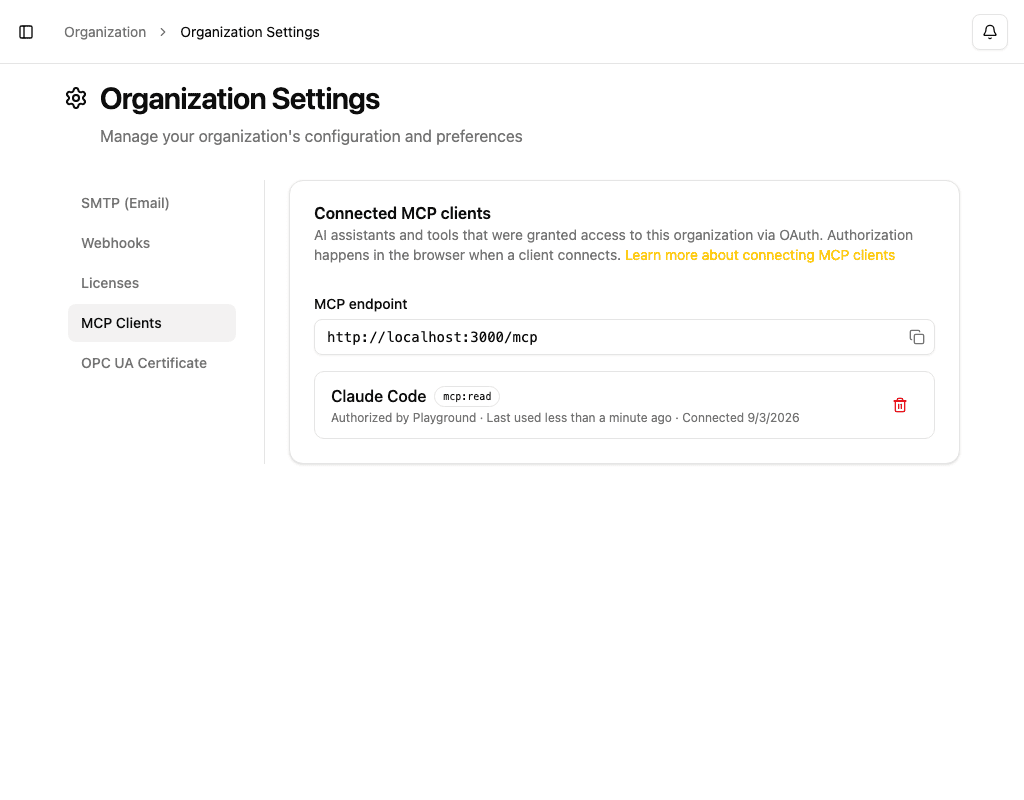
Each row shows the client, who authorized it, when it was last used, and when it was connected. To revoke access, click the delete icon and confirm.
WARNING
Revocation is immediate — the client's next request is rejected, even if its current token has not expired yet. Revoke clients you no longer use.
Available MCP tools
The Pulse MCP server exposes these tools to connected clients. Parameters are self-describing — your AI assistant will discover them automatically via the MCP schema.
list_monitors— List and filter monitors in your organization.list_incidents— List and filter incidents.query_data— Query time-series data with aggregations, displayed as an ASCII graph or table. Results can be grouped by monitor, by data point, or by data source.query_cves— Query CVE findings across your monitored devices.list_tags— List the organization's tags.list_data_sources— List data sources and, optionally, their individual data points: addresses, last readings, and which monitors read them. This is how an assistant finds the source names and point addresses thatquery_datafilters on, and the only tool that can show a data point no monitor alerts on.get_condition— Read the condition graph a condition monitor alerts on, together with what every node in it currently evaluates to and when that value began. A condition monitor has no single threshold, so this is what answers which input tripped it.list_incident_events— Read one incident's timeline: when the monitor failed and recovered, every notification delivered and to whom, acknowledgements, resolutions, and escalation steps.
OPC UA Certificate
Navigate to Organization > Settings > OPC UA Certificate to manage the application instance certificate — the shared X.509 identity Pulse presents when opening secure OPC UA channels (Sign or Sign & Encrypt mode). See OPC UA Security — Application instance certificate for a conceptual overview and the full rotation workflow.
The tab shows the active certificate's subject, validity dates, and SHA-1 thumbprint. When a rotation is in progress, both the active and the pending certificate are shown. Each thumbprint is labelled — Current for the active certificate and New — trust this before completing rotation for the pending one — so the two are never confused.
Actions
| Action | Available when | Description |
|---|---|---|
| Download PEM | Active certificate exists | Download the certificate file to install on your OPC UA servers |
| Copy thumbprint | Active certificate exists | Copy the SHA-1 thumbprint to cross-check in your server's certificate manager |
| Generate certificate | No active certificate | Provision the certificate ahead of time (Pulse also provisions it automatically on the first secure connection) |
| Rotate certificate | Active certificate exists, no rotation in progress | Mint a replacement to begin the overlap-window rotation |
| Complete rotation | Pending certificate exists | Promote the pending certificate to active — do this only after every server trusts the new thumbprint |
| Discard replacement | Pending certificate exists | Cancel the in-progress rotation and remove the pending certificate — a confirmation dialog appears |
| Revoke certificate | Active certificate exists | Emergency only: immediately replace the active certificate with a new identity |
WARNING
Revoke certificate causes an immediate outage for all secure OPC UA monitoring — every server will reject Pulse until you trust the new certificate. Use rotation for a planned, outage-free replacement.
Related
- Members & Roles -- Manage organization members
- Preferences -- Personal notification settings
- OPC UA Configuration -- OPC UA monitors and the application instance certificate